
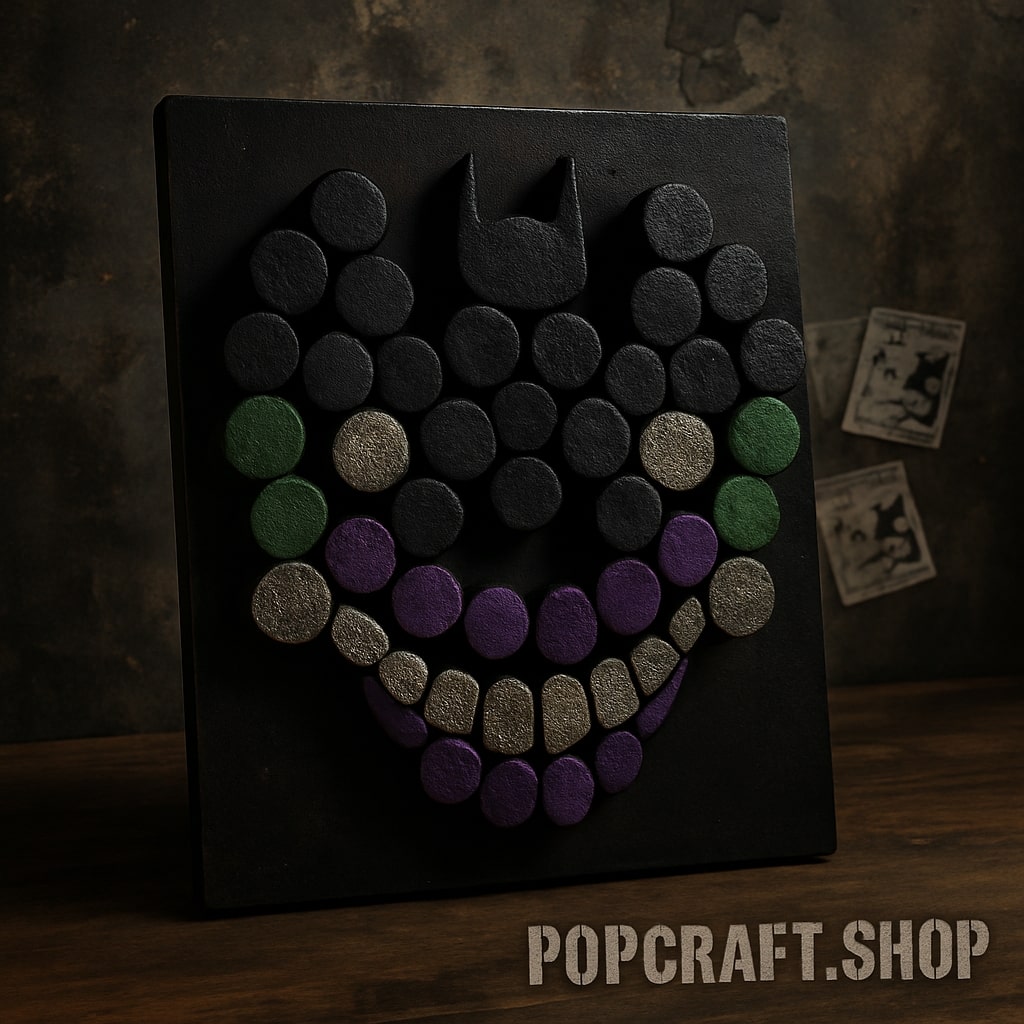
DIY Marvel Villain Cork Board – Dark Side Corks Upcycle
Let’s talk villains. Not the overused Pinterest kind of villains, but the real ones—Marvel’s finest dark legends. Loki with his charming lies, Thanos with his cosmic arrogance, or Venom just oozing menace. Imagine taking those twisted energies and turning them into something you can hang on your wall. That’s what this project is about. A DIY cork board—but not just any board. We’re making one with attitude, fandom, and actual function.
If you’ve got a bunch of wine corks lying around, good news—you’re already halfway there. And if not? Well, one trip to a bar or a craft store, and you’re golden. The rest? Some paint, glue, creativity, and just a bit of controlled chaos.
Here’s how to turn old corks into a Marvel villain–themed cork board that’s as unique as the anti-heroes we secretly root for.
Why Corks? And Why Villains?
First off—corks are underrated. They’re cheap (or free), lightweight, eco-friendly, and incredibly forgiving when it comes to crafting. You can slice ‘em, paint ‘em, glue ‘em, or even burn designs into them if you’re feeling bold.
Now let’s talk villains. There’s a certain freedom in designing around chaos. Heroes are all clean lines and noble vibes. But villains? They let you get weird. Paint splatters? Cool. Uneven texture? Even better. A little crooked? You’ve nailed it.
This project is the perfect marriage of creative freedom and fan obsession. It’s not just “DIY,” it’s DIY with attitude.
Stuff You’ll Need (Don’t Overthink It)
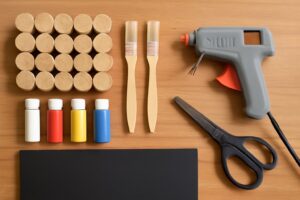
This isn’t a complicated supply list. Keep it flexible. You can go basic or full-blown craft nerd. Here’s the starter kit:
-
Corks – 40–60 for a medium-sized board
-
Base board – foam board, old tray, cardboard, anything flat
-
Glue – hot glue gun works best
-
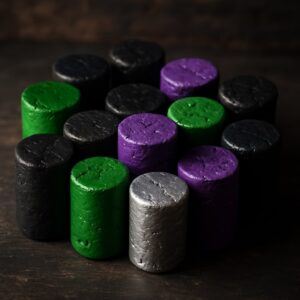
Paints – dark tones (black, green, purple), metallics for accents
-
Brushes – small for detail, big for background
-
Optional stuff: comic book cutouts, stencils, Mod Podge, markers, villain logos, pins, stickers
🛠 No corks? Ask at a wine store, bar, or grab a cheap pack on Amazon. They’re dirt cheap and totally reusable.
Prepping the Villain Vibes
Before you start cutting and gluing like a maniac, pause. Think about which villain you’re channeling. That’ll guide your whole design. Need help choosing? Try these:
-
Loki – Green, gold, horn silhouette
-
Thanos – Purple and black, Infinity Gauntlet center
-
Venom – Black/white contrast, sharp shapes, chaos layout
-
Mystique – Cool blues, fluid layout, abstract feel
-
Red Skull – Red and black, Nazi-era comic feel, bold contrast
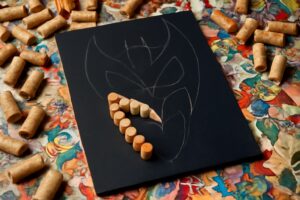
Once you lock in a character, pick a symbol or general mood. Sketch it out roughly. You don’t need to be Picasso—just figure out where corks will go, and how colors will split. A simple pencil outline on your base will do wonders later.
Step-by-Step (But Chill, Not Math Class)
Alright, here’s how to bring your Marvel mayhem to life:
1. Lay Out the Shape

-
Arrange corks loosely on the board to get a feel.
-
Want a logo (like Venom’s mouth or Thanos’s gauntlet)? Use a printed stencil to trace.
-
Go abstract? Create chaos zones: black here, metallics there.
2. Cut Corks as Needed
-
Flat slices = better painting
-
Angled cuts = cool shadowing
-
Whole corks = 3D pop
Use a sharp knife. Slowly. These little dudes can roll.
3. Paint Time
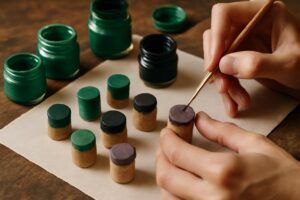
-
Base coat corks if you want a uniform vibe.
-
Hand-paint details if you’re extra.
-
Mix textures—matte and metallic look insane together.
Let some corks stay raw for texture contrast.
4. Glue It Down
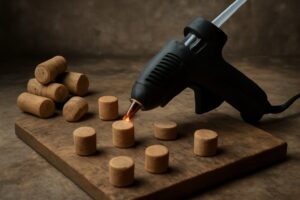
Start from the center or from the edges, depending on your design. Don’t rush. Hot glue dries fast—think before the squeeze.
5. Add Extra Villain Sauce
-
Comic cutouts from old issues
-
Metallic accents (gold leaf, glitter—if your villain would approve)
-
A bold quote: “You were never a god, you were never even a king.”
Add Function (Because It’s Still a Cork Board)

Make it usable, not just pretty:
-
Add push pins with villain heads or symbols glued on top
-
Install small hooks at the bottom for keys
-
Attach clips for notes or photos
-
Insert a memo pad for your villainous schemes
This makes your piece not just art—but art with a job.
Display It Like It Deserves
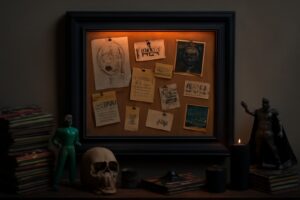
You didn’t just throw this together—you crafted a villainous masterpiece. Show it off.
Try:
-
Over your desk = Power corner
-
Entryway = Statement piece
-
Paired with villain quotes = Mood wall
-
Gallery wall = Group it with other DIYs, posters, or fan art
Add a small LED spotlight or strip lighting if you want it to glow with evil genius energy.
Common Mistakes (So You Can Dodge ‘Em)
-
Corks not prepped = paint peels
-
No layout plan = messy chaos
-
Using weak glue = corks pop off
-
Overdecorating = can’t see the villain anymore
Keep it clean. Keep it clever. Channel the villain’s essence, not just their face.
What You’ll Feel After This
Not even joking—you’ll feel weirdly accomplished. It’s not just about gluing some corks. It’s about turning waste into wonder. It’s about owning your fandom, instead of buying mass-produced stuff.
This project is a reminder that:
-
You can create cool things from what you already have
-
You don’t need permission to make something loud and personal
-
Villains? They’re complicated. So is your art. And that’s beautiful.
Quick FAQ
Q: How many corks do I need?
For an A4-sized board, around 40–50 corks depending on spacing.
Q: What paint sticks to cork best?
Acrylics or chalk paints work great. Spray paint also works with sealant.
Q: Can I make this with synthetic corks?
Yes! They’re a little harder to cut but paint just as well.
Q: Can I include heroes too?
Sure—but remember, the dark side is more fun 😈
Q: How long does it take?
1–3 hours, depending on how extra you get.