
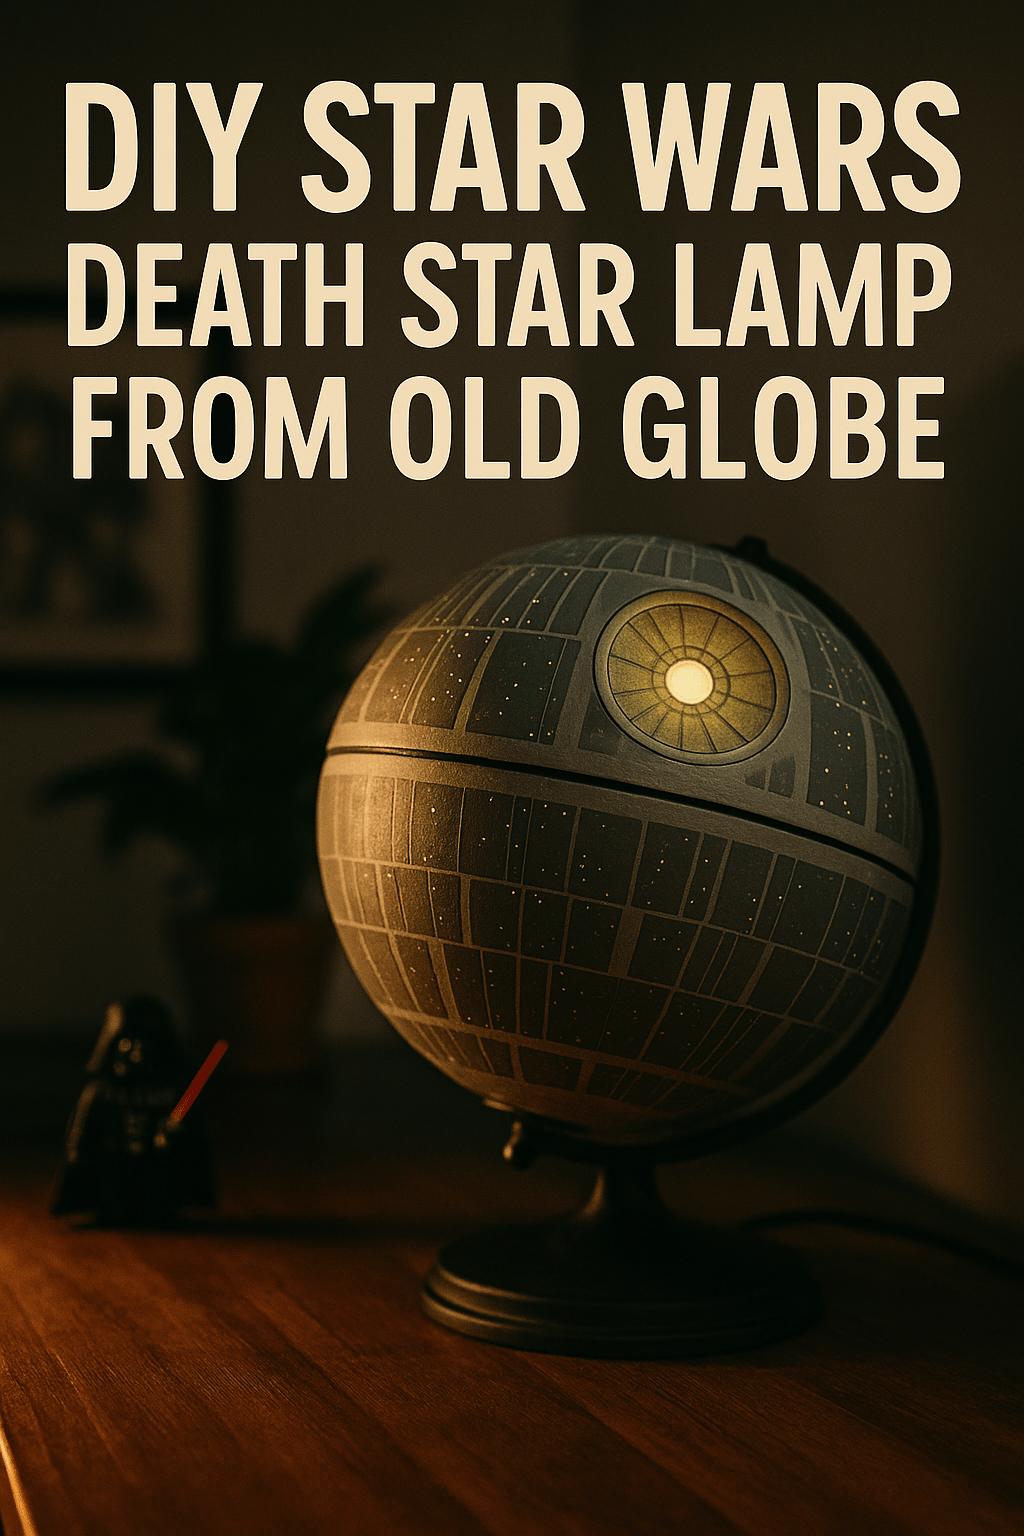
Why I Turned an Old Globe into a Glowing Death Star (And You Should Too)
Okay, real talk — I’ve always wanted the Death Star in my room. Not the “blow up Alderaan” kind, just the glowing, mysterious sphere hanging ominously in the corner while I binge “The Mandalorian” or pretend I’m piloting an X-Wing. But everything online was either too expensive, too tacky, or just… meh.
One random weekend, I was decluttering my garage and found this old globe. You know, the kind that spins on a wooden stand and still has countries like Yugoslavia printed on it? Lightbulb moment. That thing was already shaped like the Death Star, and it was begging for a second life.
So I turned it into a lamp. A Death Star lamp. And trust me, it was so much easier than I thought — and way cooler than I expected. No crazy electronics, no 3D printing, no professional tools. Just some craft supplies, paint, and a weekend’s worth of patience.
Whether you’re a Star Wars geek, a DIY junkie, or just someone who wants a lamp that screams “I don’t do basic,” this is the project for you.
Let me break it all down for you — from garage trash to glowing Star Wars treasure.

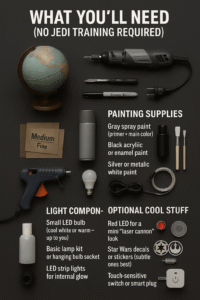
What You’ll Need (No Jedi Training Required)
Let’s be honest — half the reason people give up on DIY projects is because the materials list looks like it came from a spacecraft manual. Not this time. I kept it cheap, simple, and local-store friendly.
Here’s your mission gear:
🧰 Tools:
-
A dusty old globe (plastic is perfect)
-
Rotary tool (like Dremel) or X-acto knife
-
Sharpie or mechanical pencil
-
Drill with hole saw (for the lamp socket)
-
Sandpaper (medium and fine)
-
Hot glue gun
🎨 Painting Supplies:
-
Gray spray paint (primer + main color)
-
Black acrylic or enamel paint
-
Silver or metallic white paint for the “laser lens”
-
A couple of small brushes or foam dabbers
💡 Light Components:
-
Small LED bulb (cool white or warm — up to you)
-
Basic lamp kit or hanging bulb socket
-
Optional: LED strip lights for internal glow
✨ Optional Cool Stuff:
-
Red LED for a mini “laser cannon” look
-
Star Wars decals or stickers (subtle ones look best)
-
Transparent disc or small dome for detailing
-
Touch-sensitive switch or smart plug
You can find almost everything on Amazon, Walmart, or your local craft store. I grabbed my globe for $5 at a thrift store, and the total project didn’t even hit $30.
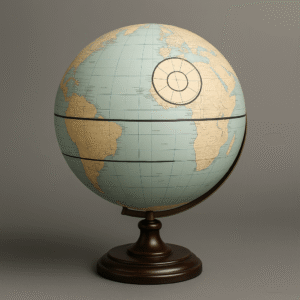
Prepping the Globe: From Atlas to Awesome

Alright, now that your gear is ready, let’s prep the star of the show: that old globe.
First, pop it off the stand. Most of them just unscrew at the axis points. Keep the stand if you want a desktop lamp, or ditch it if you’re going for a hanging ceiling version (like I did).
Next, give it a good wipe down. Mine had decades of grime and stickers on it (shoutout to third-grade me who thought Yugoslavia was a pizza topping). A little soapy water and elbow grease go a long way.
📐 Time to Sketch the Death Star
Grab that Sharpie and draw the Death Star’s iconic trench. It’s basically a horizontal band that wraps around the sphere’s middle. Freehand it or trace around a rubber band to get a clean line.
Now mark where the superlaser dish goes — that circular indentation where the beam fires from. It’s usually a bit above the equator (like Europe’s side of the globe). Use a lid, coin, or any round object to trace the outline.
You can go full nerd and pull up Death Star blueprints (yes, that’s a real thing), or you can just wing it. No judgment.
Carving the Details: AKA the Tricky but Fun Part
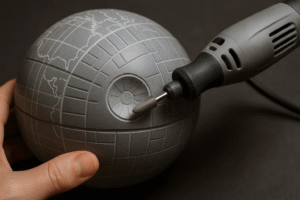
This is the most hands-on part, and yeah — it can get messy. But once you start carving in those lines, it starts looking like the real thing.
✂️ Let’s Cut It Up
Use a Dremel or precision knife to carve panel lines across the globe. Don’t overdo it — Death Star panels are subtle. I did a mix of horizontal and vertical lines, about 1–2 inches apart, to mimic the look.
For the laser cannon dish, I used a sanding bit on my Dremel to carve a shallow dome. If that’s too fancy, just paint it darker and add a transparent disc on top later.
Pro tip: Go slow. Light pressure. And wear a mask — globe dust is not delicious.
If you mess up? No worries. The real Death Star had a giant hole in it — you’re already doing better.
Painting: This Is Where the Magic Happens
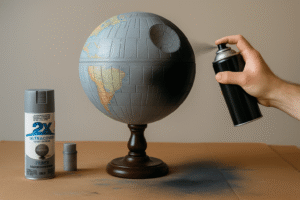
Once your Death Star is carved, it’s time to paint. Start with a primer coat if the globe is dark or glossy. Then spray the whole thing gray or metallic silver — aim for even coverage.
After it dries, use a fine brush and black paint to fill in the trench and panel lines. Dry brushing works great here — you want depth and texture, not clean cartoon lines.
For the laser dish, add a touch of metallic white or red inside. You can even glue a red LED behind it if you’re feeling extra.
Wanna get fancy? Take a sponge and dab a little black and silver randomly around the globe for that gritty, space-worn look. That’s how you go from “school project” to “collector’s item.”
Installing the Lamp Mechanism (Without Blowing Up Alderaan)
So now that your Death Star globe is painted and looking all kinds of galactic, it’s time to make it actually light up. Because let’s be honest, it’s not a Death Star unless it glows like it’s about to fire on a rebel base.
Don’t worry — this part sounds harder than it is. You’re basically just turning it into a fancy lampshade.
💡 Choosing the Right Bulb
The key here is to keep it cool and safe. Use LED bulbs only. They’re energy-efficient, don’t get hot, and last practically forever. I used a soft white bulb (2700k) for that warm Death Star vibe, but if you want it to feel more sci-fi and sterile, go with a cool white (5000k).
If your globe is small, go for a low-wattage LED (under 7 watts). Bigger globe? You can bump it up. Just make sure your socket and wires match the wattage.
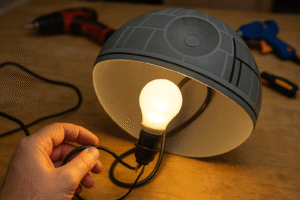
🧰 Wiring 101 — No Jedi Magic Needed
If you’re comfortable using a basic lamp kit, this part’s a breeze:
-
Drill a hole in the bottom or top of the globe (depending on if you’re hanging it or setting it on a desk).
-
Thread the lamp cord through.
-
Secure the socket inside the globe using hot glue or a small bracket.
-
Screw in the bulb. Done.
Want a USB-powered version? Use a USB light bulb or LED puck light. That way, you can plug it into your PC or wall adapter.
Bonus idea: Add a touch-sensitive switch. They’re cheap and give a modern twist to your vintage Death Star.
⚡ Safety First
-
Double-check the wattage and don’t overload.
-
Keep wires away from paint or hot glue mess.
-
Test the lamp before final sealing — it’s way easier to troubleshoot that way.
And just like that, your Death Star now has the power to light up a room instead of destroying it.
Assembling Your Death Star (AKA Putting It All Together)
Now comes the final assembly. This is where everything clicks into place (literally and emotionally). Trust me, once you see it glowing, you’ll forget how many times you sanded your fingers off or inhaled spray paint.
🪛 Mounting It Right
There are three cool ways to display your Death Star:
-
Desk/Tabletop Style: Put it back on the original globe stand or attach it to a wooden base with a lamp rod. Super stable and classic.
-
Hanging Pendant Lamp: This one’s my personal favorite. Hang it from the ceiling like it’s floating in your personal galaxy. You’ll need a hanging lamp cord and ceiling hook. Lightweight globes make this easy.
-
Wall Mount: Wanna go full museum mode? Mount it like a sconce using a wall bracket and keep the cord hidden behind furniture.
Make sure whatever method you choose, the lamp stays balanced. You don’t want a lopsided Death Star — that’s just a bad omen.
🔍 Final Checks
-
Does the bulb sit centered inside?
-
Are the wires neatly tucked?
-
Is the globe sealed or hinged for easy access?
Pro tip: Add velcro strips or magnetic clasps if you want to open the globe later and upgrade the internals.
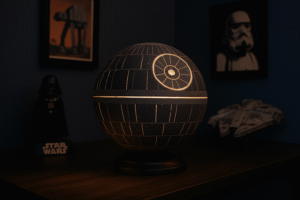
Once you’re happy, plug it in, flip the switch, and cue the Imperial March — your DIY Death Star is alive.
Styling Your Lamp Like a True Star Wars Fan
Here’s where things get really fun. Your Death Star lamp is awesome by itself, but when it’s styled right, it becomes the centerpiece of your room.
🖼️ Best Places to Display
-
Gaming desk – next to your custom keyboard and RGB lights
-
Nightstand – let the force light up your dreams
-
Bookshelf – pair it with Star Wars Funko Pops or a Millennium Falcon model
-
Home theater – ultimate mood lighting while watching Rogue One
🧑🎨 Decor That Matches the Vibe
Want to go full galaxy-mode? Here are some extras you can place nearby:
-
Framed blueprints of the Death Star
-
Posters of Vader, Tarkin, or rogue pilots
-
A small shelf with Lego X-Wings and TIE Fighters
-
Starfield wall decals or glow-in-the-dark stars
You’re not just building a lamp — you’re building a tiny corner of the galaxy. And anyone who walks in will instantly know where your loyalty lies (hopefully not with the Empire, though 😅).
Mistakes I Made (So You Don’t Have To)
Alright, time for some honest talk. Every DIY project comes with hiccups. I made a few, and if I had a time machine (or, you know, a hyperdrive), I’d go back and avoid them.
Here are some screw-ups to dodge:
🚫 Cutting Too Deep
When carving, I got carried away with the Dremel and cut through the globe wall in a few spots. Don’t do that. Go light and shallow — you can always go back and deepen lines later.
🎯 Bad Placement of the Superlaser Dish
I originally placed the dish too low, and it looked off-balance. Pull up some Death Star reference images to get that iconic placement right.
💡 Wrong Bulb Size
I used a bulb that was way too big at first — it lit up unevenly and made the globe heat up. Stick to low-wattage LEDs.
🔌 Forgetting to Test First
Seriously. Always test the wiring before sealing the globe shut. I had to crack mine open after realizing the switch wasn’t working.
Mistakes are part of the fun — just make sure yours don’t involve fire or electric shocks. 😅
How Much Does It All Cost? (Spoiler: Not Much)
Here’s the breakdown of what I actually spent on my DIY Death Star lamp:
Item |
Cost (USD) |
|---|---|
| Old globe (thrifted) | $5 |
| Spray paint (gray) | $4 |
| Acrylic paints | $3 |
| Dremel tool bits | $5 |
| Lamp kit + LED bulb | $7 |
| Misc. (glue, brushes) | $5 |
| Total | $29 |
Now compare that to some Etsy Death Star lamps that cost $80–$200+. Yeah… you just built one for a quarter of the price. And yours is way cooler, because it’s personal.
Why DIY Star Wars Projects Just Hit Different
I won’t lie — there’s something insanely satisfying about creating something with your own hands, especially when it involves a fandom you love. Turning a dusty old globe into a glowing Death Star lamp isn’t just a weekend project — it’s a full-on mood.
Let’s break down why these geeky DIYs are more than just craft projects:
🧠 Mental Boost Galore
Ever had one of those weeks where everything feels… blah? Getting lost in a creative project is one of the best ways to reset your brain. You’re painting, carving, designing — it’s hands-on therapy.
You also get that dopamine hit every time you flip the switch and your glowing globe turns into a sci-fi masterpiece. Feels like launching a Star Destroyer from your bedroom.
👨👩👧👦 Bonding Time
This is an awesome project to tackle with kids, friends, or your partner. Especially if they’re fellow Star Wars nerds. You’re not just building a lamp — you’re making memories (and probably a mess, but hey, it’s worth it).
You get to share your skills, pass on your love for the saga, and maybe even spark a little curiosity in DIY culture.
🎨 Self-Expression
You can buy a Star Wars lamp off Amazon… but it’ll look like every other mass-produced item out there. Yours? Yours has quirks, scars, custom colors — it tells a story.
Your lamp is your fandom, your style, your build.
How to Turn This Into a Side Hustle (Yup, Really)
If you just built this lamp and thought, “Dang, that was fun,” then good news — people are paying real money for custom fandom pieces like this.
💰 Start Selling Custom Lamps
Platforms like Etsy, Instagram Shops, Facebook Marketplace, or even your local comic cons are full of fans looking for handmade Star Wars decor. And guess what? They’re willing to pay a premium for anything that doesn’t look mass-produced.
Post photos of your lamp, offer a few variations (color, base, size), and you’re off to the races. Start small — even 2-3 sales a month at $50–$100 each can be a solid little side income.
📸 Market It Right
-
Take pics in low light to show the glow
-
Add cool captions like “Feel the power of the dark side… of your bedroom lighting”
-
Use hashtags like #StarWarsDIY, #DeathStarLamp, #GeekDecor
Trust me, people scroll and buy with their eyes first.
Final Thoughts: The Force Is Strong with This One
So, there you have it — an old globe, a couple of paints, some tools, and a whole lotta imagination. And now you’ve got a glowing Death Star sitting in your space like it was beamed in from the Empire itself.
Not only did you build something awesome, you:
-
Saved money
-
Upcycled something old
-
Learned new skills
-
Flexed your fandom
-
Possibly kicked off a side hustle
That’s a big W in every galaxy.
So next time you switch on your lamp, remember: you didn’t just “make” something — you brought the Death Star back to life… and this time, it’s lighting up your world, not destroying it.
Now go. Show it off. And may the DIY Force be with you.
FAQs – Everything You Still Might Be Wondering
Q1: How long does this project take?
Most people can finish the lamp in a weekend — maybe 4–6 hours total. If you take your time with carving and painting, it might stretch to two days. Totally worth it.
Q2: Is it safe to leave the lamp on overnight?
Yup, as long as you’re using an LED bulb and the wiring is done correctly. Always double-check your connections and make sure the globe material isn’t flammable.
Q3: Can I make this without power tools?
You bet. A precision knife or even a heated pen can do the carving if you’re patient. Painting and wiring are just as simple by hand.
Q4: Where can I find a globe for cheap?
Thrift stores, flea markets, Facebook Marketplace, or even your attic. Seriously — you probably already have one collecting dust somewhere.
Q5: Can I use LED strips instead of a bulb?
Absolutely! LED strips are great for an even glow and can add cool effects like color changes or pulsing light. Just make sure the power source fits inside your globe.