
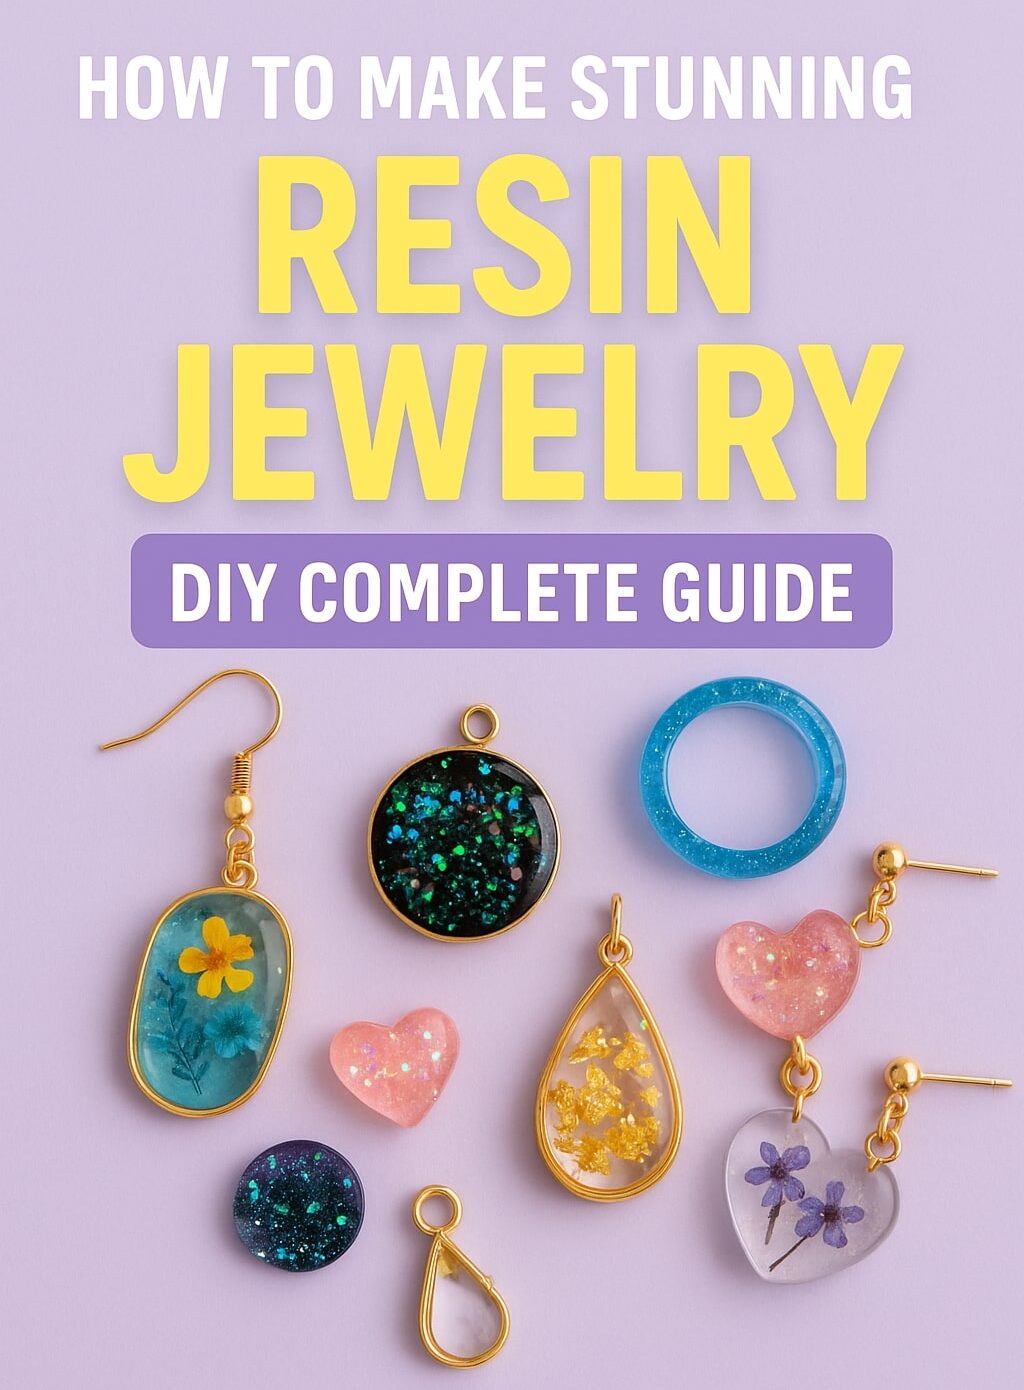
If you’ve ever scrolled past one of those glittery, floral, or galaxy-style resin pendants on Instagram and thought, “Ugh, I want that,” guess what? You can totally make it yourself. No fancy workshop. No art degree. Just a little patience, a handful of supplies, and a slight addiction to pretty things.
In this guide, I’ll walk you through how to make resin jewelry that actually looks good — not like something your cousin made at summer camp (no offense, Kevin). Whether you wanna make a cute pair of earrings or a full-on statement necklace with dried flowers inside, I got you.
Let’s get into it — starting with why everyone and their cat is suddenly obsessed with resin jewelry.
Why Resin Jewelry DIY Is Blowing Up Right Now
Affordable, Custom, and Seriously Cool
Okay, first off — resin jewelry is crazy versatile. Like, you can make stuff that looks boutique-level high-end for under $5 a piece. We’re talking everything from minimalist clear rings to galaxy glitter earrings to aesthetic pendants with pressed flowers or gold flakes. And you get to control it all. Color, style, add-ins — even the shape.
That kind of customization? Yeah, it’s addictive.
Plus, unlike other crafts that require years of practice (looking at you, silversmithing), resin gives you instant gratification. You mix, pour, and in a few hours — boom. You’ve got wearable art. It’s like baking, but shinier and less edible.
Whether you want to make gifts, start a small shop, or just have something fun to do on a Sunday afternoon, resin jewelry gives you that feeling — you know, the “holy crap I made this” buzz.
Trending on Social Media & Etsy Shops
Let’s be real — a big reason resin jewelry is so hot right now? TikTok and Instagram reels. Scroll for five minutes and you’ll see someone demolding a sparkly pendant with lo-fi music in the background and a caption like “my new hyperfixation 🧪✨.” It’s a whole vibe.
Etsy sellers are cashing in too. You’ll find resin earrings selling for $20–$40 (or more!) — but guess what? The actual material cost per piece? Sometimes under $1. So yeah… people are not only enjoying the DIY process, but some are building legit side hustles around it.
What You’ll Need to Start (Tools & Materials)
Basic Resin Kit Essentials
Let’s talk supplies. Don’t worry, you don’t need a studio. You will need a few basics though:
-
Resin – Epoxy is the go-to for beginners. It cures slowly, giving you time to mix and pour.
-
Hardener – Usually comes paired with your resin. You mix it in at a specific ratio (usually 1:1).
-
Mixing cups + sticks – Plastic or silicone ones are best. Do not use kitchen stuff. Ever.
-
Silicone molds – Jewelry-specific ones come in all shapes: hearts, ovals, squares, etc.
-
Gloves – Resin is sticky and mildly toxic before curing. Don’t be a hero. Wear gloves.
-
A mask + good ventilation – Fumes are real. Your lungs will thank you later.
Optional, but highly recommended:
-
Heat gun or torch – To pop air bubbles like a pro.
-
Tweezers – For placing dried flowers, glitter, foil, etc.
-
Toothpicks – Super helpful for tiny adjustments inside molds.
Optional Add-ons to Take It Next Level
Once you’ve got the basics, you’ll probably (read: definitely) want to spice things up:
-
Pigments – Alcohol inks, mica powder, glitter, or neon dyes.
-
Inclusions – Dried flowers, gold flakes, tiny stickers, beads, shells.
-
UV Resin – Great for smaller pieces or layering, cures under UV lamp in minutes.
-
Doming resin – Used for topping off pieces to get that glossy bubble finish.
Where to Buy Resin Supplies Online in 2025
Here are some hot spots for supplies:
Store |
What They’re Great For |
Website |
|---|---|---|
| Amazon | Bulk kits, tools, pigments | amazon.com |
| Sophie & Toffee | Super cute molds and UV resin | sophieandtoffee.com |
| Resin Obsession | Pro-level resins and tools | resinobsession.com |
Prices vary, but a decent beginner setup should run you $25–$40 max.
Choosing the Right Type of Resin for Jewelry
Epoxy vs. UV Resin — What’s the Difference?
Not all resin is created equal. Here’s the tea:
-
Epoxy Resin:
-
Best for beginners.
-
Mixes in two parts (resin + hardener).
-
Takes 12–24 hours to cure.
-
Great for larger pours or deeper molds.
-
Easier to control bubbles and color mixing.
-
-
UV Resin:
-
Single bottle, no mixing.
-
Cures super fast (in minutes) with UV light.
-
Better for shallow molds or coating layers.
-
A little pricier.
-
Yellowing over time is a slight risk.
-
If you’re just starting out, go with epoxy. It’s more forgiving. UV’s great later when you’re making a bunch of smaller pieces and want quick turnaround.
Safety Tips You Shouldn’t Skip
Resin might look all fun and glittery, but it’s still a chemical. Respect the goo.
-
Always wear nitrile gloves.
-
Work in a ventilated area — near a window or with a fan.
-
Don’t eat or drink around your resin setup.
-
Keep it away from pets and kids.
-
Read the label. Like, actually.
Cured resin? Totally safe. Uncured? Treat it like an uninvited party guest.
Prepping Your Workspace Like a Pro
Safety First — Gloves, Ventilation & Setup
Your setup matters more than you think. Resin can be sticky, messy, and a pain to clean up if you’re not prepped.
-
Use a plastic table cover or trash bag over your workspace.
-
Wear old clothes. Resin ruins fabric fast.
-
Set up near a window or run a fan.
-
Have a resin-only tray or surface for mixing and pouring.
-
Keep paper towels and baby wipes nearby for spills.
-
Use measuring cups with lines for accuracy.
Trust me — your future self will be so glad you didn’t pour resin over your new rug.
Step-by-Step Resin Jewelry DIY Process
Mixing Resin Properly (Without the Bubbles)
Alright, this is the part where people either fall in love or run screaming. Mixing resin sounds easy — and it is — but only if you get the hang of it. The goal? Smooth, clear resin with zero bubbles and perfect consistency. Sounds like a dating profile, right?
Start by measuring equal parts resin and hardener in two separate cups. Accuracy matters here. A little off and your piece might end up sticky forever. (Yup, I’ve been there.)
Pour the two into one larger mixing cup. Now mix — slowly. Don’t go all blender mode. Stir like you’re gently waking up soup. Do this for a solid 3 minutes, scraping the sides and bottom. It’ll look cloudy at first, but it clears up. If you see bubbles, don’t freak — we’ll handle that next.
Let it sit for a minute after stirring. A lot of surface bubbles will rise on their own. You can also hit it with a quick blast from a heat gun or torch — not too close or you’ll scorch it. Trust me, burnt resin smells like regret.
Pouring Into Molds + Adding Elements
This is the fun part. Once your resin is ready, gently pour it into your silicone molds. Don’t fill them all the way just yet if you plan to add stuff inside.
Use tweezers to drop in dried flowers, glitter, confetti, foil, or whatever funky things you’ve collected. Wanna do those aesthetic “floating” looks? Pour half, add your inclusions, then pour the rest. Easy.
For layered effects, let each layer cure slightly before adding the next. Just don’t wait too long or the layers won’t bond well.
You can swirl pigments with toothpicks, make marbled effects, or embed tiny stickers. Go wild. This is where your creativity really shows.
Curing & Demolding: Timing Is Everything
Let’s be real — waiting is the hardest part. But rushing this will ruin your piece, so breathe.
With epoxy resin, curing usually takes 12–24 hours depending on the brand, thickness, and room temperature. Don’t touch it. Don’t move it. Don’t peek. Just walk away.
Once cured, the mold should pop right off easily. Silicone molds are magical like that. If it’s a little bendy still, it’s not fully cured — give it more time.
Pro tip: If your piece has sharp edges or a little overflow, sand it down with fine-grit sandpaper. You can even polish it or coat it with a thin layer of resin for that glassy dome effect.
Finishing Touches: Sanding, Drilling, and Doming
So your piece is cured. Awesome. But it’s not done done.
Sanding for Smoothness
Grab a few sheets of sandpaper — start with something like 400 grit, then go finer (800–1000+ grit) as needed. Wet sanding works best (just a little water while sanding). Smooth out any sharp bits, bumps, or mold marks.
Be patient. This step turns “eh” into “oooh.”
Drilling for Jump Rings or Hooks
Wanna turn your resin piece into earrings or a pendant? You’ll need a pin vise hand drill — those tiny, twisty manual ones are perfect.
Mark where you want the hole, and gently twist until you’ve gone through. It takes a minute, but it’s safer than power tools (and less likely to snap your piece in half, ask me how I know).
Pop in a jump ring, add your earring hook or chain, and you’re golden.
Optional: Doming for That Glossy, Luxe Look
Some pieces dry flat or a little dull on top. That’s where doming resin comes in — a thicker layer applied just on top to give that juicy, high-gloss finish.
Carefully drop a little onto your piece and let it self-level. Don’t overdo it — resin will drip if you’re not watching.
Once cured, you’ll have that crystal-clear glass effect that makes people go “wait, you made this?”
Common Mistakes to Avoid in Resin Jewelry Making
We’ve all had flops. Some tragic. Some hilarious. Here are a few avoidable oopsies:
-
Not mixing resin properly – leads to soft, sticky disasters.
-
Too many bubbles – stir slow, use a heat source, or let it sit after mixing.
-
Touching before it cures – resist. It’ll leave fingerprints or dents.
-
Forgetting to seal flowers/paper – unsealed inclusions soak up resin and discolor. Use Mod Podge.
-
Pouring too thick – deep molds take longer and might trap bubbles.
-
Skipping safety gear – always wear gloves, and ventilate. Don’t mess with fumes.
Learning from your own mistakes is fine. Learning from mine is faster.
Creative Resin Jewelry Ideas to Try
Once you’ve mastered the basics, you’ll want to try everything. Here’s some inspo to spark your next project:
-
Galaxy pendants – dark blues, glitter, and a swirl of white = cosmic magic.
-
Pressed flower earrings – soft, romantic, very cottagecore.
-
Glow-in-the-dark charms – super fun for kids or late-night aesthetics.
-
Mini resin shaker charms – fillable pendants with glitter that moves inside.
-
Zodiac sign necklaces – customize with glitter constellations.
-
Resin letters or name pendants – great for personalized gifts.
You can also mix resin with wood, metal, even concrete for totally unique looks. The only limit is your imagination (and maybe your attention span).
How to Sell Your Resin Jewelry Online (and Actually Make Money)
Alright, so you’ve got a bunch of cute earrings and pendants piling up. You’ve given some to your friends, flexed a bit on Instagram, and now you’re thinking… “Wait. Could I actually sell these?”
Short answer: yes. People are literally paying $15–$50 for handmade resin jewelry on platforms like Etsy, Shopify, and even Instagram Shops. If your pieces are creative and well-finished, you’re already halfway there.
Build Your Brand, Not Just a Store
Think about what makes your pieces you. Is it the dreamy colors? The cute fruit themes? The edgy goth aesthetic? Lock that down and let it guide your:
-
Logo & packaging
-
Color scheme
-
Product photography
-
Social media vibe
People don’t just buy jewelry — they buy the vibe. Make it consistent.
Where to Sell
-
Etsy – Easy setup, built-in audience, but they take fees.
-
Instagram/Facebook Shops – Great if you’re good at content and reels.
-
Shopify – More control, more work. Better for serious businesses.
-
PopCraft.shop Marketplace – (If you’re on a curated handmade platform like this one, even better!)
Pricing Your Work
Don’t undersell yourself. Factor in:
-
Material costs
-
Time spent
-
Packaging
-
Platform fees
Start with 3x material cost minimum, then adjust based on style and demand. And always photograph in natural light. It makes even simple pieces look chef’s kiss.
DIY Resin Jewelry Kit Ideas for Beginners
Thinking of sharing the love? You can totally put together resin kits — for gifts, for workshops, or even to sell.
A good beginner DIY kit includes:
-
Small bottles of epoxy resin + hardener
-
1–2 silicone molds
-
Mixing cups & sticks
-
Gloves
-
Pigments (maybe mica powder or a small glitter set)
-
Tweezers
-
Instruction card (with your Insta handle of course)
You can theme the kits too:
-
Ocean Vibes – blues, shells, wave molds
-
Galaxy Girl – dark pigments, star glitter, moon molds
-
Floral Fantasy – pressed flowers, pastel pigments, oval molds
Bundle it all in a cute box or canvas bag and boom — a resin DIY experience people will actually be excited to open.
This is also a sneaky good business idea. Resin kits are hot on Etsy right now, especially around holidays.
Best Resin Molds for Jewelry (And Hidden Gems You Should Try)
Let’s talk molds. Your resin jewelry is only as good as your mold game. The good news? There’s a mold for everything.
Beginner-Friendly Molds
-
Circles, ovals, teardrops
-
Small hearts or squares
-
Ring molds (flexy ones are best!)
These are easy to pour, cure evenly, and don’t overcomplicate things.
Creative & Unique Molds
-
Zodiac shapes
-
Crystal geodes
-
Mini fruit slices
-
Tarot card-style rectangles
-
Letters & initials
-
Faux shattered glass
Where to buy?
| Store | What You’ll Love | Link |
|---|---|---|
| PopCraft.shop | Trendy, exclusive handmade molds | popcraft.shop |
| AliExpress | Cheap but long shipping | aliexpress.com |
| Etsy | Unique, artist-made molds | etsy.com |
Hot tip: Some creators even 3D print their own molds. If you’ve got a printer, the mold world is your oyster.
How to Keep Resin Jewelry from Yellowing or Getting Sticky
You’ve probably seen it — resin pieces that turn yellowish over time or get gross and tacky. Ew. Let’s prevent that.
Why Does Resin Yellow?
-
UV light exposure (sunlight = enemy)
-
Poor-quality resin
-
Incorrect mixing ratio
Tips to Keep Your Pieces Gorgeous
-
Store finished pieces away from direct sunlight
-
Use UV-stable or high-quality epoxy resin
-
Keep unused resin sealed tight and cool
-
Mix accurately. No guesswork. Use a measuring cup.
If your piece still gets slightly sticky or soft even after a full cure? Chances are you didn’t mix the right ratio or you didn’t stir long enough.
Also — never try to speed-cure epoxy resin in the oven or microwave. Don’t do it, bro.
Is Resin Jewelry Safe to Wear? (Here’s the Truth)
This is a question that comes up a lot, especially from people with sensitive skin.
Here’s the real deal: once resin is fully cured, it’s non-toxic and safe to wear. It’s the uncured stuff that’s problematic.
Still, for best practice:
-
Don’t wear resin jewelry that hasn’t cured fully (soft or tacky = no go)
-
Use stainless steel or hypoallergenic hooks for earrings
-
Avoid coating raw flowers or metal inside resin unless sealed properly
-
Don’t sell pieces unless you’re 100% sure they’re cured and safe
If you’re super sensitive or allergic to certain metals, always add an extra barrier between resin and skin — or stick to pendants and brooches instead of rings.
FAQs About DIY Resin Jewelry (Stuff Everyone Wants to Know But Doesn’t Ask)
Q1: Can I make resin jewelry if I’ve never done any crafting before?
Totally. Resin is beginner-friendly if you follow the basics. Start with a kit, use simple molds, and don’t stress if the first batch isn’t perfect. You don’t need to be “artsy” — just curious.
Q2: Is resin jewelry waterproof?
Yup, once fully cured, resin is waterproof. But if you embed materials like paper or flowers, make sure they’re sealed inside. Also, avoid soaking your jewelry in water long-term to keep metal findings from tarnishing.
Q3: How long does it take to cure resin jewelry?
With epoxy resin, expect 12–24 hours depending on temperature and thickness. UV resin? Just a few minutes under a UV lamp. But for best results, always give pieces extra time to fully harden.
Q4: Can I add photos or personal items into resin pieces?
Heck yes. You can seal tiny photos, love notes, concert tickets, or even baby teeth (yes, it’s a thing). Just seal paper with Mod Podge or clear tape before embedding — otherwise, resin will soak and ruin it.
Q5: Is making resin jewelry messy or dangerous?
Not if you prep right. Resin is safe after it cures, but while working with it, you’ll need gloves, ventilation, and patience. It can get sticky and smell a little funky, but nothing you can’t handle with a good setup.
The Final Word: Resin Jewelry Isn’t Just a Craft — It’s a Vibe
So yeah. That’s the full resin jewelry DIY journey. From mixing gooey chemicals to holding a glowy little galaxy pendant in your hand — there’s nothing like it.
It’s creative, kinda messy, super satisfying, and honestly addictive in the best way. Whether you’re in it to start a handmade biz, make custom gifts for your crew, or just chill out after a long day, resin has this magical way of turning “just messing around” into “whoa, I actually made something cool.”
And don’t sweat the learning curve. Your first few pieces might be wonky or full of bubbles. Who cares? That’s part of the charm. Just keep experimenting. Try weird molds. Mix wild pigments. Add a leaf from your backyard. Make mistakes and flex them proudly.
Because at the end of the day — this isn’t about perfection.
It’s about creating something that didn’t exist until you made it.
Now go make stuff.